Showing posts with label Grenzer. Show all posts

Sunday, 28 April 2013

The AAR of Surprise at Kosen (A SDS Scenario)

I have found some spare time today (winter weather helps!) to compose the AAR of the last SDS Scenario, "Surprise at Kosen". You can see below some highlights:

The alarm has been sounded and the Grenzer sentinel opens fire while the French are approaching under the cover of the cemetery walls
French and Grenzer are facing across the stream after the first moments

The hand to hand combat on the bridge is becoming more and more bloody

The French and grenzer officers are fighting one with another

A lucky French shot kills the Grenzer officer before he could finish the fallen French lieutenant

A 'forgotten' Chasseur watches his officer standing defiantly amongst a pile of wounded and dead men

A more detailed account (40 pictures) has been uploaded to the main web site (here) along with the Scenario rules (here). The game was fast and fun (including a forgotten Chasseur and the redemption of a previously frightened Chasseur!) and the Activation step was carried out by using the Doghi’s mechanism.

Enjoy it!


Share |

Tuesday, 23 April 2013

Kosen for Song of Drums and Shakos

Today is holiday in Valladolid (and Castilla y León). We are celebrating the battle of Villalar (1521) when the Comuneros of Castilla were routed by the imperialist forces of Carlos I (or Charles V). It was a rout, but in that day we commemorate our autonomy from the Spanish central state! 
With no job and some hours for me, I have run the Kosen SDS Scenario (see here, here and here).
It was a fast and furious game, reaching its outcome, a French victory,  in 12 turns, including a calling for help to the Yahoo Song of Blades and Heroes forum, immediately answered by Andrea Sfiligoi and Sergio Laliscia themselves!

The French lieutenant standing amongst the fallen

The central event was a bloody encounter over the bridge involving both chief of the squads and the Grenzer sargeant. Despite their gallantry, Natporučnik (lieutenant) Kocsis and Sargeant Spasic resulted dead in that melee along other private (the "Big" brother) and other four Grenzers resulted dead around. The French had four dead (including Sargeant Funes) and two wounded fantassins in the same of the battlefield.
In addition to the bridge melee, the most striking fact was that the final shot killing Natporučnik Kocsis  (and breaking the Grenzers, was fired by a Chasseur that was previously forced to flee by the Grenzer "Big Brother" (Fear rule). Once recovered, the Chasseur fired his lucky shot. Incidentally, the question posted on the Yahoo Forum was related with the behaviour of a fleeing man after his flee moves.
A final curiosity: after the end of the fight, a French chasseur was discovered hidden behind a tree. The poor guy was forgotten during the advance!
A more detailed AAR will be posted in the next days.. If I find some spare time!


Share |

Saturday, 9 February 2013

Getting used to the new scale for SDS

After so many years using a distorted scale in the gaming table, I'm finding very hard to visualize the houses, trees, streams, bridges, roads. etc to the same scale, 1/72 (HO), of the figures forming my wargaming armies.
Before, when Napoleon's Battles (NB) was my only ruleset (the scenery of my previous wargaming efforts was too stylised) one figure represented always 120 men, and a 4-figures base the area covered by 480 men. On the other side, a NB building or B.U.A. was the representation of a village or small town, while several buildings or BUA's made for medium-sized towns. A forest consisted of an area with several randomly scattered model trees and with the ground covered with lichen or model foliage. Obviously, roads and streams were oversized, while rivers were undersized, a bridge was a bridge, a lone tree was only an ornement... in short, a small chaos where everything was abstracted. However, my brain was perfectly accustomed.
When I moved to Lasalle, which has a larger scale and allows to game smaller battles, the things began to change slightly, but everything was still easy to fix by simply increasing the number of buildings or B.U.A.´s or increasing the forested area... and so.
But we arrived to Song of Drums and Shakos (SDS), a skirmish game where one figure is one man. Here, the things definitely do not look good, because the soldiers look like giants when they are side to side to buildings or trees.

The solution is simple: to build new scenery elements at the correct scale... and there we are.
The following pictures show the play area of Kosen, the next SDS scenario. The scenic elements are not yet fully finished (mostly need the final painting touches), but the overall look will be about the same.


Too realistic for me!


Share |

Saturday, 1 December 2012

The rules for Kosen SDS Scenario

Taken from http://iron-mitten.blogspot.com/
Deployment (See the previous post)
Austrian Grenzer
On sentry duty (see map) 1D6 Grenzer
Inside the cabin/ houses: Officer, NCO and the rest of the squad.
French
Deployed within 1M of the table edge or inside 1M of a wooded edge.

Scenario Special Rules
These rules are similar to the used in the  SDS Wethau bridge scenario, with the only addition of a rule about bridge demolition:
 Destroying bridges special rule
·      At the cost of 1 action, a model armed with axe may try to destroy the wooden bridge. Treat this as a hand-to-hand “combat” between the model and the bridge. All possible modifiers (strong, better weapon, engineer, multiple combatants) apply, with the bridge having a C3 Combat value. The opponent rolls dice for the bridge and combat is resolved normally.
·      Only sappers can use the +1 Combat modifier, which is only applicable to this “combat”.
·      If the model loses the “combat” or the model wins without doubling the bridge’s score, nothing happens. The bridge is only slightly damaged.
·      If the model wins doubling the bridge’s score, the bridge has been damaged. Decrease its Combat value by 1.
·      In both these cases the model can try to attack the bridge again if it has actions remaining. If the feature was damaged, the lowered Combat score is used.
·      The bridge is destroyed when its Combat value reaches zero.
 
Victory conditions
The French goal is to break the bridge whereas the Grenzers must to avoid it.
·      Normal rules and morale tests apply to attackers (i.e. they lose if their Squad breaks). The French mission is to destroy the bridge, so if it occurs the game automatically ends with a French victory.
·      Grenzer with bad moral runs towards the village where they can continue the fight (if they wish).


Share |

Saturday, 24 November 2012

Kosen: A Scenario for Song of Drums and Shakos

The French Army has been routed at Leipzig and is retiring westwards. In an effort to cover the French withdrawal, Napoleon has sent General Bertrand, with a strong force, to destroy the bridge over the Elster River at Kosen, thus delaying the Allied pursuit.
Lieutenant Michel from the 2/8e Léger (Belair's Brigade, 12e Division, French IV Corps) has been sent, with a pair of sappers and a small detachment of his battallion, to destroy a small secondary wooded bridge, located in the outskirts of Kosen over a watermill channel. However, a Grenzer squad from the Waradisner Kreutz Grenzer No. 5 Regiment (Crenneville's Light Division, Austrian 3rd Armeeabteilung), has already occupied and garrisoned the area.

Old Glory French Elite Company Skirmishing
French Squad 12 men 552 points
- Lieutenant Michel
Points 82 Quality 3+ Combat 2
Special Rules Elan, Leader, Light, Pistol, Sword
- Sergeant Funes
Points 66 Quality 3+ Combat 2
Special Rules Light, Musket, NCO, Sword
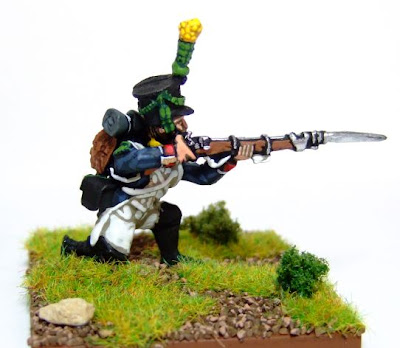
- One Light Voligeur (marksman)
Points 50 Quality 4+ Combat 2
Special Rules Elan, Light, Marksman, Musket
- Two Sappers
Points 27 Quality 4+ Combat 2
Special Rules Blunderbuss, Engineer, Strong, Axe
- Seven Light Voltigeurs
Points 42 Quality 4+ Combat 2
Special Rules Elan, Light, Musket

My Hat 8204 Grenzer Infantry Close order unit
Grenzer Squad 12 men 503 points
Natporucnik Kocsis
Points 70 Quality 3+ Combat 2
Special Rules Leader, Light, Pistol, Sword
- Sargeant Spasic
Points 66 Quality 3+ Combat 2
Special Rules Light, Musket, NCO, Sword
- One 'Big Brother'
Points 62 Quality 4+ Combat 3
Special Rules Light, Musket, Strong, Fear
- One Marksman
Points 41 Quality 4+ Combat 2
Special Rules Light, Marksman, Musket
- Eight Grenzers
Points 33 Quality 4+ Combat 2
Special Rules Light, Musket

The gametable is shown in the Figure. The central square is the legal SDS playing area for 20mm figures: a 90x90 cm square. The general description is a wooded zone traversed by a channel with a wooden bridge. The outskirsts of Kosen are in the southwest side. A small cabin and a stone walled cemetery are near the bridge. Some scattered trees provide the only cover besides the cemetery.

Next: the Scenario specific rules and the Solo solutions

Note: The French Voltigeur model is taken from Macphee's Miniature Men blog. You can find more Grenzer information in my blog and also at my main web site.


Share |

Saturday, 8 September 2012

And the Kosen winner is....

The next game will be a Lasalle battle 'The crossing point. Kösen. October 21, 1813'. The scenario is an adaptation of the C.S. Grant’s ‘Crossing Point’ scenario of his book ‘Programmed Wargames Scenarios'(Wargames Research Group, 1983) but located after the battle of Leipzig. Summarising up, the French must to destroy a bridge to cover their retreat, whereas the Austrians, which have seized it previously, try to prevent it.
As indicated in a previous post (See this post) all the Scenarios of the book “Programmed Wargames Scenarios” are heavily randomised, giving a different game each time. The map, deployments an orders below was one of the four designed after rolling all the required dice in the Gran’s Scenario altough an EXCEL spreadsheet was used instead, when applicable.
Due to the different scales, the actual procedures were a combination of Gran and Lasalle ones. Bold sentences refer to Gran’s scenario. The full OOB appears in he previous post on Kosent and the AAR of a previous re-fight, done with a home divisional version of Napoleon's Battles ,can be found at the main web site, or in the posts of this blog with the label Kosen.

Game table for Lasalle Kosen

Deployment
Austrian (blue) forces
- Its mission is “to hold the crossing point” in order to ensure the bridge over the Elster, thus allowing them to outflank the retreating Grande Armée.
- The Vanguard (all the Infantry units of the Light Division plus its Brigade commander) must be deployed on th table “50% north and 50% south of the river”. Their orders allow for “A flexible defence with the ability to respond to attacks, follow up and counter attack. Well ordered and controlled withdrawal if required”.
- Reinforcements: the rest of the units (: Chevaux-Leger No.5; Chevaux-Leger No.7 plus Horse battery; IR No.8 plus Brigade battery; IR No.7; IR No.37 and IR No.60 plus Brigade battery. The normal arrival procedure (p. 91 of the e-Lasalle book) is used.When a unit arrives, a dice will indicate the entry point with 1 or 2 being F, 3 or 4 being G and 5 or 6 being H. The first unit in a brigade marks the enter point used by the others units in the same brigade.
- All the Austrian reinforcements will enter in march column formation The Brigade commanders arrive with their first arriving unit, Divisional commanders will enter with their first or second arriving brigade (50%/50%). The C-i-C will enter with his first, second or third arriving brigade (20%/30%/50%).
- The orders for the reinforcementes depend on the situation at the bridge:
Situation good (no danger to the crossing point) Reinforcements disciplined and deploy as ordered
Situation in balance (50/50) Reinforcements rush exuberantly into the battle
Situation bad (crossing point about to be lost) Reinforcements rush exuberantly into the battle
French (red) forces
- Its mission is “to seize and destroy the crossing point".
- There are no French units on the table at the start so all enter as reinforcements. The arrival Lasalle procedure is slightly modified: “Take the number of the current turn. Add to this the Vigor modifier of the subcommander in command of that reserve force. Then roll one die, and if it is less than the modified turn number, the reserve force has arrived “
- The order of march is the following:
       Point K: 1/12th; 2/12th; 3/12th; 12th Division battery Division; Young Guard Light Cavalry; Old Guard Horse Artillery
       Point L: 38th Wurttemberg; 15th Italian Division Division
- Each Brigade commander enters with his brigade. Each Divisional commander enters with his first division. Morand can arrive with his first, second or third arriving brigade (50%/30%/20%). Bertrand enters along Morand.
- The initial Bertrand’s battle plan is “Advance to medium range and send forward a parley party under white flag to debate the crossing. If this is rejected then a unit of cavalry, close at hand, should attempt to rush the crossing by surprise”.
- However, “the response to the arrival of reinforcements will cause varying stages of increased urgency in his attempt to achieve the objective. A single dice throw for each enemy unit to appear will provide a gradually accumulating score which will reflect the response of the Red Commander.
      Less than 10: no change in orders or activity.
      10-20: increased urgency. Troops in charge range will come to contact. Troops still not deployed will advance at 'forced march'.
      21-35: attempt to seize crossing immediately. Troops still not deployed well forward will 'double' forward.
      36-50: panic attack on crossing by all forces which if repulsed will result in disorder and poor morale.
      51 or more: all attempts to storm bridges will falter and retire. Assaults will break down into fire-fights and forward movements will cease.”

Watch this thread!

P.S. By the way, the winner was.... Scenario number two


Share |

Saturday, 2 June 2012

Kösen 1, 2, 3, 4


The next thing will be a re-fight of Kösen. The scenario is an adaptation of the C.S. Grant’s ‘Crossing Point’ scenario of his book ‘Programmed Wargames Scenarios'(Wargames Research Group, 1983). The General situation is as follow:
"Blue has a small force, which has moved north at great speed to secure the crossing point and arrived there in the early hours of the morning. They know that a Red Force is on the way to seize the crossing and is likely to start arriving from the north shortly after dawn. Blue has reinforcements on the way but they are being hastily assembled and may arrive at any time during the day and in any order. Dawn is 0630."
The historical background is taken from G. Nafziger's 'Napoleon at Leipzig. The Battle of Nations 1813’(The Emperor Press, Chicago, 1996) and is located after the Napoleon's defeat at Leipzig and his western retreat:
"On 21 October Napoleon sent General Bertrand with a strong force to attack and destroy the bridge by Kösen [on the Saale River], in an effort to cover the French withdrawal from attack by the allies via that avenue. On the left bank, where Neu-Kösen lay, the road crossed a nearly unclimbable ridge, an important tactical position to seize as to stop the allies, who were advancing through Naumburg in their pursuit of the French”.

The real combat involved elements of the Austrian 3rd Armeeabteilung under FZM Gyulai and the remaining rests of the Bertrand’s polyglot IV Corps (comprising French, Wurttemberg and Italian units). The O.O.B's were modified and adapted from the Nafziger's book cited above as well as from “The Greenhill Napoleonic Wars Data Book” (Greenhill Books, London, 1998) of Digby Smith. The Napoleon Series web-site (Allied OOB at Leipzig and French OOB at Leipzig) provided the names of the brigadiers. I have also added a division of French Young Guard Cavalry under Lefebvre-Desnoettes to add some color to the French units. The final OOB's, used in the previous fight with my divisional home-version of Napoleon's Battles were:

Austrian 3rd Armeeabteilung (Blue force)
13 Battalions/2 Regiments/3 batteries; Army Moral 47 Break point 16

C-i-C Gyulai (-/¶)

Light Division Crenneville (-/-)
Infantry Brigade Hacht (-1/¶)
Waradisner Grenz R/I/SK2 +
St George Grenz R/I/SK2 +
7Jaeger R/E/SK2
Cavalry Brigade Kopp (-1/-)
Chevauleger No. 5 R/E/Pu +
Chevauleger No. 7 R/E/Pu +
6pdr Horse Battery Horse/2 cannon/Medium/1 Howitzer

2nd Division Murray (-/*)
1st Brigade Lamezan (-1/-)
1/Erzherzog Ludwig-Josef IR 8 R/E/SK1 +
2/Erzherzog Ludwig-Josef IR 8 R/E/SK1 +
3/Erzherzog Ludwig-Josef IR 8 R/E/SK1 +
1/Kurfurst von Wurzburg IR 7 R/E/SK1 +
2/Kurfurst von Wurzburg IR 7 R/E/SK1 +
3/Kurfurst von Wurzburg IR 7 R/E/SK1 +
6pdr Brigade Battery Foot/4 cannon/Medium
2nd Brigade Lowenwarth (-1/¶)
1/Mariassy IR 37 R/E/SK1 +
2/Mariassy IR 37 R/E/SK1 +
1/Gyulai IR 60 R/E/SK1 +
2/Gyulai IR 60 R/E/SK1 +
6pdr Brigade Battery Foot/4 cannon/Medium


French IV Corps (Red force)
14 Battalions/3 Regiments/3 batteries; Army Moral 44 Break point 15

C-i-C Bertrand (-1/*)

12me Division Morand (+1/*)
1st Brigade Belair (+1/-)
1/8e Légère R/E/SK2 +
2/8e Légère R/E/SK2 +
2nd Brigade Toussaint (-/*)
1/13e Ligne R/E/SK2 +
2/13e Ligne R/E/SK2 +
3rd Brigade Hulot (+1/-)
1/23e Ligne R/E/SK2
2/23e Ligne R/E/SK2
1/137e Ligne R/A/SK1
2/137e Ligne R/A/SK1
1/2 Foot Artillery Foot/3 cannon/Medium/1 Howitzer
2/2 Foot Artillery Foot/3 cannon/Medium/1 Howitzer

38me Division Franquemont (-1/*)
Wurttemberg Converged Line R/E/SK1
Wurttemberg Converged Light R/E/SK2

15me Division Fontanelli (-/-)
Italian Converged Light R/A/SK1
1/Converged Line R/A/SK1
2/Converged Line R/A/SK1
3/Converged Line R/A/SK1
Italian Sapper Company

2me Guard Light Cavalry Division Levebvre-Desnoettes (-1/*)
Young Guard Lanciers V/A/La +
Young Guard Chasseurs V/A +
Young Guard Grenadiers V/A
5/Old Guard Horse Battery Horse/2 cannon/Medium/1 Howitzer


The Grant's book presents always several alternatives for deployments, orders, goals and reinforcements for both sides, thus opening an almost infinite variety of Scenarios, that are randomly chosen (i.e throwing several D6 dice). With the help of an EXCEL worksheet, I have designed four Scenarios... but only one will be fought.

Follow this thread!


Saturday, 26 May 2012

Wethau for Lasalle. The A.A.R.

After a long delay (too many job activities!), I have uploaded to main site the Scenario and the AAR of the combat of Wethau for Lasalle
The result was a Drawn battle in terms of Lasalle conditions, but if the Austrian and French aims are taken in account, the real result was an Austrian tactical victory, because the Augereau IX Corps was delayed in its advance towards the Leipzig rendez-vous.

See also the posts with the label Wethau in this blog to see a day-to-day account of the wargaming refight. The posts also include the previous fight at the Wetha bridge, A Song of Drums and Shakos Scenario, that was also an Austrian victory. The Emperor's aigles are not being lucky!

Next Lasalle scenario (date unknown!) will be a Lasalle refight of Kosen, already fought with my Divisional Napoleon´s Battles home adaptation.

Share |

Saturday, 28 April 2012

Wethau (VI). The end

The French situation has worsened around the Mertendorff ford and the French have been forced to evacuate the village, while the Allied cavalry is trying to outflank them

In the Wethau area the things are not going better for the French, although the 2/86e de Ligne has momentarily stopped the advance of the 1/von Strauch #24 IR and their divisional artillery is firing at full speed against the Austrian cavalry

But the 2e Dragoon Regiment is broken by the Vincent#4 Chevauxlegers

and the 3/32e de Ligne is caught in the wrong formation by the Kaiser#1 Chevauxlegers and is also wiped out

The surviving French cavalry in the center is forced to retire towards the far bank of the stream

so the French wings must retire at full speed. The 51e Division from Wethau

and the 52e division from the Mertendorff ford.

The Kaiserlicks have won the day!


Sunday, 22 April 2012

Wethau (V). The cavalry battle

The fight in the centre and near the Mertendorff ford has become a large cavalry battle. The Austrian C-i-C is using his cavalry superiority in the zone to launch a powerful all-of-all attack. The French infantry, in square or deployed in the village, can only wait the final of the combats around them.
Initially, the 22e Dragoons rejects with some difficulty the Austiran Erherzog Johann #1 Dragoons

But their comrades of the 25e Dragoons are routed (but not broken) and fall back before the Klenau #5 Chevaux-legers.


While in the extreme flank, the 18e Dragoons suffer the same fate at hands of the Austrian Kienmayer #8 Hussars

The French centre is broken at the French wings are at serious risk of becoming isolated

At the same time than their right flank is in danger to be turned by the Allied cavalry and Cossacks

The things are becoming really bad for the French!


Share |

Thursday, 12 April 2012

Wethau (IV) The fight near the bridge

The fight near the Wethau bridge is becoming general. The arriving Austrian reinforcements, 1sdt and 2nd battalion of the von Strauch#24 IR (1st Brigade/1st division/II Corps)are running at full speed to help the 1/Brooder Grenz.

But the Croats are broken by the 2/17e Légère

Meanwhile, the 1/von Strauch#24 IR finishes the almost broken 2/58e Ligne after a fierce hand-to-hand combat

And then routs easily the combined attack of the 6/121e and 6/122e Ligne battalions

While their comrades of the 2/von Strauch#24 IR also breaks the 2/17e Légère near the woods

The French infantry is having a very poor performance!


Saturday, 7 April 2012

Wethau (III)

The 1/Brooder Grenzer has managed to stop the outflanking French attack by breaking the 3/10e Légère caught in the defile between the cemetery and the woods.

The all-arms Austrian Light Division is desperately buying time, while awaiting the arrival of reinforcements, while the French are trying to fan out from the Wethau bridge.


The Allied C-i-C is trying to break the French line, by pushing the French Quenet's Dragoon brigade towards Wethau, to isolate it from the rest of the French cavalry reinforcements.


The Austrian cavalry converges towards the French bridgehead in the Mertendorff's ford.

While the Cossacks try to oppose the Dragoons while awaiting the arrival of the Austrian Hussars.

The Allies must to attack or perish!


Thursday, 5 April 2012

Wethau (II)

Facing a double menace, Liechtenstein, the Austrian C-i-C, takes a risky option using all his cavalry to break the French line.
The Kaiser#1 Chevauxlegers Regiment, facing the flanking fire of the French artillery, takes the 27e Chasseurs a Cheval Regiment in flank breaking them, while their comrades of the Vincent#4 Chevauxlegers carry out a similar maneoeuvre against the 14e Chasseurs a Cheval Regiment.

The Austrian pressure is breaking the French centre and manwhile, near the Mertendorff ford, the Er. Ferdinand #3 Hussars and the Klenau#5 Chevauxlegers Regiments make a combined attack that will break the French 3e Hussar Regiment. However the 'Spanish' Quenet's Dragoons (1st Brigade/5th Heavy Cavalry Division) are running fast to close the gap in the centre of the French line.

After routing the French Hussars, the Klenau#5 Chevauxlegers charge the French Foot battery, while the French infantry forms square and the rest of the French 'heavy' cavalry reinforcements, are arriving in the rearguard.


Meanwhile, a lucky French volley has blown up the Austrian battery near the cemetery. This is a very funny Lasalle feature!

The French try to take advantage of the Austrian right flank weakness, but they have only a lone unit, the 3/10e Légère Regiment, that is advancing fast between the cemetery and the woods. However, Liechtenstein has sent the 1/Brooder Grenz IR and 7th Jaegers to stop the menace.

Wethau is becoming another cavalry battle!


Share |

Sunday, 25 March 2012

Wethau (I)

The combat of Wethau has started. The Augereau's plan is simple: carry out the Wethau village covered by the cavalry, while the rest of the infantry in the far right flank is trying to outflank the Austrians. On the other hand, Liechtenstein has massed his cavalry on the plain on his left flank, while awaits for the arrival of more infantry to force the French to re-cross the stream.
A massed French attack, carried out by the 3/10e and the 3/32e Ligne has broken the Austrian Jaeger #4 battalion garrisoning Wethau winning all the village for the French.


The full Aymard's brigade has deployed in the left (far) bank of the Wethau stream, ready to begin the crossing, but they must wait because the Allied cavalry is mastering the plains beyond.

The Vincent#4 Chevauxlegers have charged the 27e Chasseurs a Cheval that have crossed the stream to protect the Aymard's left flank. However, they are countercharged by the 14e Chasseurs a Cheval, that are protecting their comrades, and are routed, but not broken.

The advance of the Lagarde's brigade at the Mertendorff ford is being delayed by the presence of the Allied Streifcorps cavalry. Only the 3e Hussars is protecting that flank against the Cossack hordes and the menace of the regular Austrian cavalry.

Watch this space!

Note: The full details of the Scenario have benn uploaded to the main web site


Share |